
Uneek Cotton Shrug Project
Posted by Emily on Dec 3rd 2020
Uneek Cotton Shrug Project
We wanted to give you a project idea to go with the 8th Fiber Gift of Christmas, Uneek Cotton Yarn that could be woven on a Rigid Heddle Loom and wasn't a scarf, dishtowel, or other rectangular object. You don't have to have a massive floor loom to make fabric that you can use to sew garments! If you're creative about shapes and seaming you can make pieces for your wardrobe on your Rigid Heddle Loom.
We're going to cover how we made our shrug from weaving all the way through finishing the project with sewing.
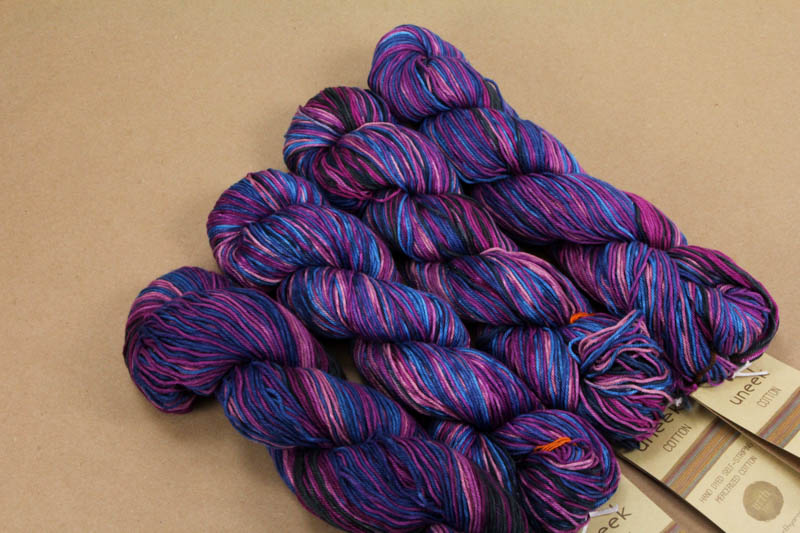
Uneek Cotton Shrug Project Materials
- 4 Skeins Uneek Cotton Yarn (5, 6 skeins for larger sizes)
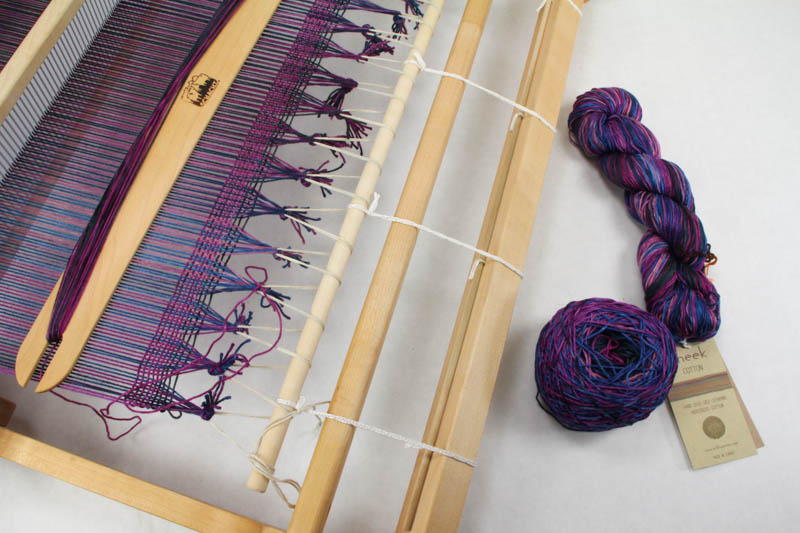
- Rigid Heddle Loom 20" (24", 32") wide, we used the Schacht Flip 20" Loom to make an Adult Small Shrug
- 10 Dent Rigid Heddle
- Stick shuttles
- Darning Needle for hemstitching
- Iron for finishing
- Pins for finishing
- Sewing machine or hand sewing needle.
- Matching cotton sewing thread
Pattern: Plain Weave
We wrote this pattern up for a Rigid Heddle Loom but you can also use a Floor Loom or a Table Loom! Check out our blog post, How to Create Plain Weave on a Multi Harness Loom if you need help setting up your treadles!
Important sizing note: The shrug we made is a an Adult Small because we wove it on a 20" loom at 20" wide, so after shrinkage our fabric was around 15" wide. If you're a Medium-Large you will want to have more width for your arms. 24" is wide enough for Medium and Large. If you're size XL and XXL you can use a 32" loom. The size of the shrug is limited by the width of your loom so if you have a larger loom you can make it as wide as you want for longer arms. No matter what size you make, follow all of our instructions the same way for weaving length and finishing. The only difference between sizes is the width of the fabric. You will need 5 skeins for a 24" wide piece and 6 skeins fo a 32" wide piece. If you want to create a custom size: the length of the back of the finished shrug is calculated by the complete width of your weaving, less 25% for the shrinkage.
For your warp you want to have enough room to weave 63" of length off tension. This means you likely want at least 73" of warp or more depending on how much loom waste you create. We will be cutting all of the fringe off before finishing the shrug so we don't need that much extra space beyond our 63". See the sizing note above to determine how wide to weave your piece. Our 20" wide 63" warp used 2 skeins of yarn.
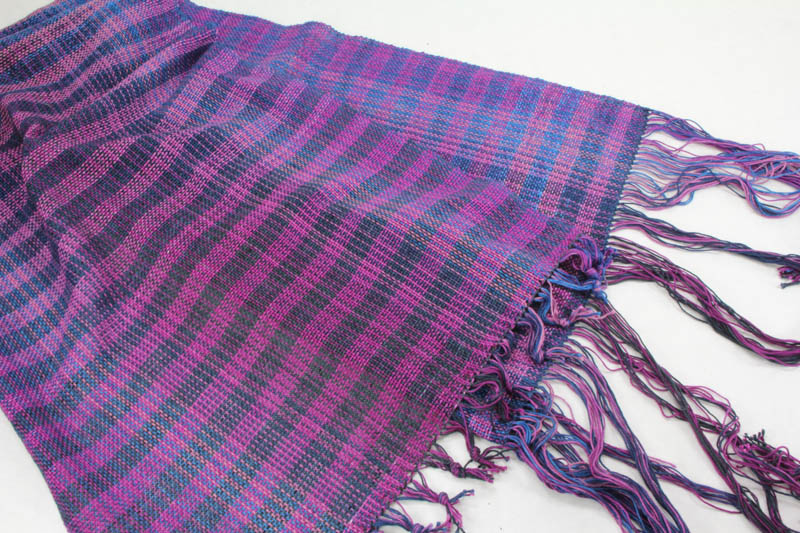
Weave up your 63" of length. Keep in mind when you need to start a new skein that you need at least 2" of overlap between ends to make sure they don't unravel in the washing process. For our sample we did match up the next skein of yarn so it was in the same part of the color sequence we left off on. If you don't do this there may be a noticeable stripe in your project. Finish both ends using hemstitch. We have a handy YouTube tutorial for hemstitch if you aren't familiar with this technique:
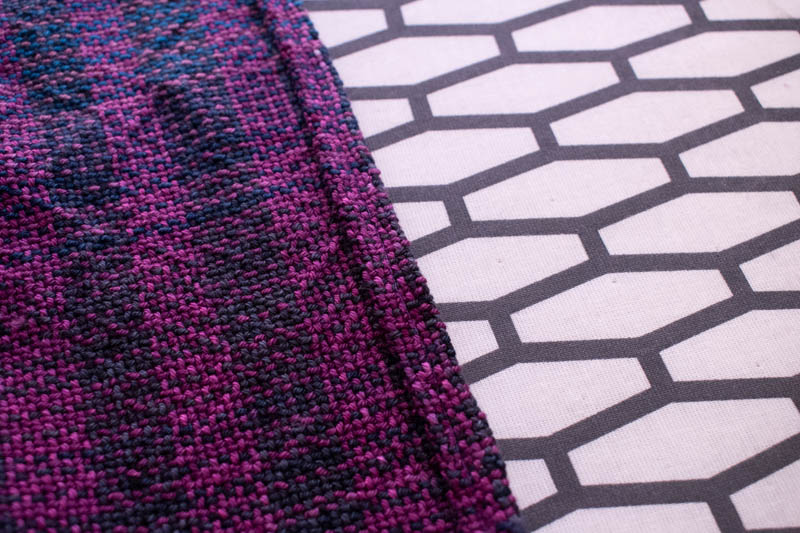
After your hemstitch is all done, cut your project off your loom. Our piece measured 19" wide by 63" long when it was off the loom and had 9 picks per inch. This used up most of 2 more skeins of yarn with some leftovers. Below you can see that weaving a variegated yarn can cause pooling. In our piece this produced these wide stripes, which we think are a fun feature! If you weave a wider piece your stripes will be skinnier.
Trim your fringe if you have extra fringe and tie bundles into knots so your yarn doesn't unravel during washing. We're going to cut these knots off before we sew our shrug, so you don't need to be too precise or even with your knots. We want to shrink our fabric BEFORE we sew it so wash your fabric in hot water. Ours was put on the Cottons setting with the water set at Hot. Then put it in the dryer, also on the Cotton setting.

Above is our fabric post washing. It's dimensions after washing were 15" wide and 53" long, so you can see there was quite a bit of shrinkage in the washing process! Grab your iron, and iron out all of the wrinkles in your fabric before you sew it. Trim your fringe very close to the end of your weaving, 1/4" or less.
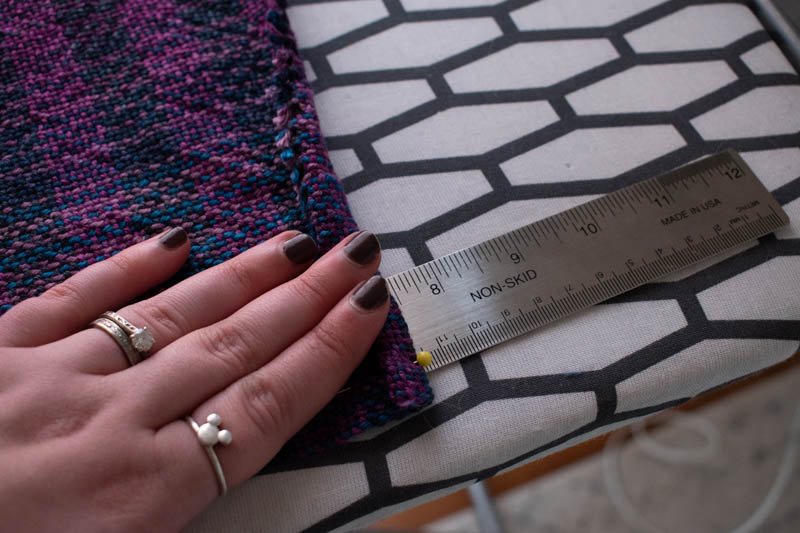
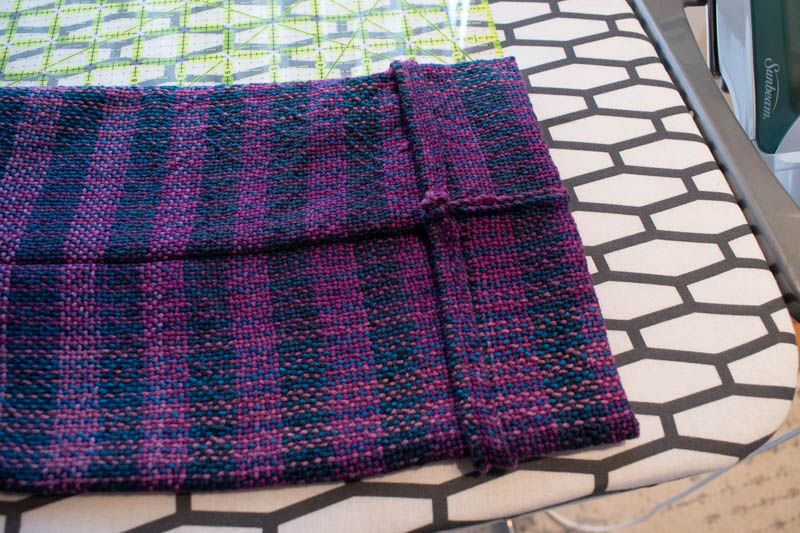
Create a 1/2" rolled hem on both ends of your fabric. Do this by folding your edge in 1/4" and then folding that in another 1/4".
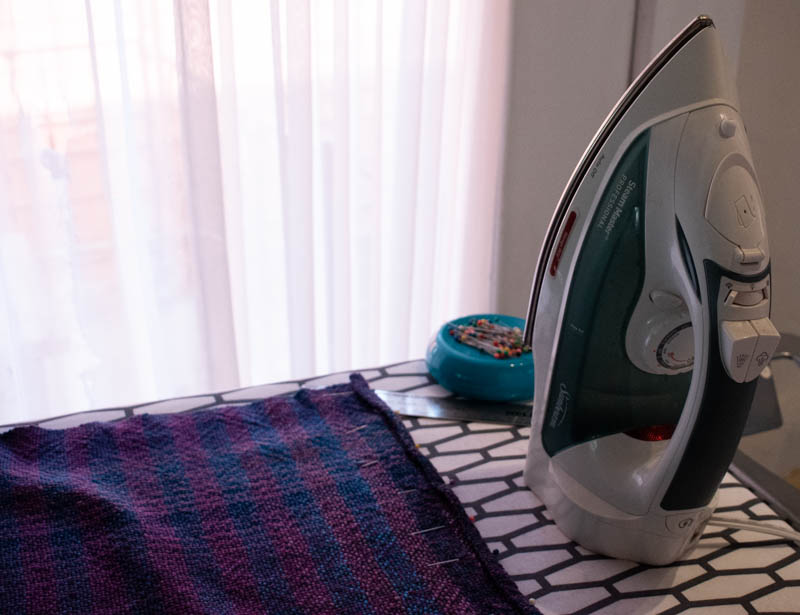
Be sure to press your hem as you fold, this will make your finished piece much neater. Pin your hem as you iron it to keep it tidy, then sew it. We used a sewing machine for all of our sewing with this project, but you can also hand sew it if you don't have a sewing machine.
Give your hems a final press after they are sewn to make sure they stay nice and neat.

Now we're going to create the arms of our shrug. Fold your fabric in half lengthwise with your rolled hems on the outside. Measure 15" from the end of your cuff and pin the edges of your fabric together on both sides. Seam that together 1/8" from the edge to create minimal bulk.
Your project should be looking pretty much like a shrug now! Turn the arms inside out so your seam is on the inside. Then fold up your cuffs 2 1/2" and press. You may also want to tack these down with some hand sewing so they don't move out of place.
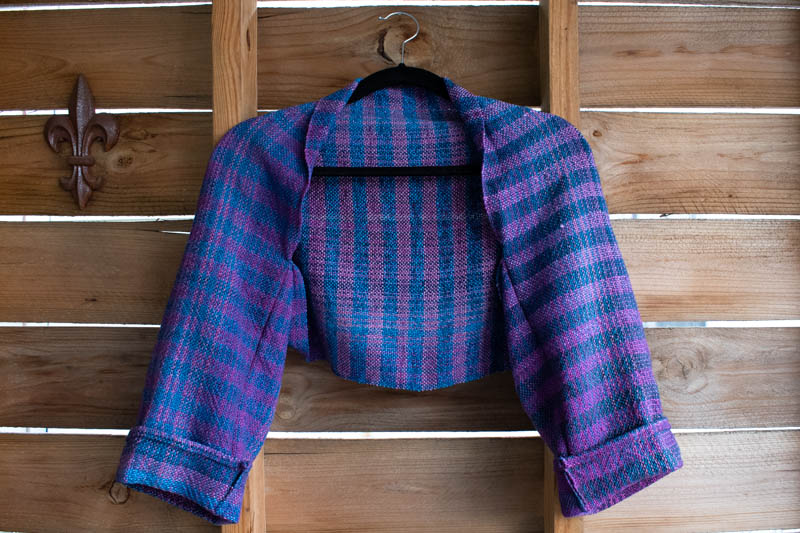
And that's it! You now have a finished shrug. We hope you enjoy making this simple garment project as much as we did.
Remember the Uneek Cotton Yarn we used for this project is on sale for 20% off December 4th through December 10th 2020 as part of the 12 Fiber Gifts of Christmas!